SQ-4M - Eurorack multi track MIDI step sequencer
SQ-4M is a software to run on the VMC-system. It provides a MIDI step sequencer with 16 parallel monophonic tracks, inspired by the sequencers in the Roland JX-3P and SH-101. The software is published as open source under the creative commons license "by-nc-sa 4.0"
- Download the Version 0.35 of the Arduino code
- This software is a beta-version. There is no warranty on it!
--- AFTER UPLOADING A NEW FIRMWARE always do a FACTORY RESET in the setup menu; when upgrading from Versions below 0.17 do also a POTENTIOMETER ADJUSTMENT one time. ---
sound example
This is a sound example which was created using the SQ-4M. Basically this is a single repeated F-maj7 chord played over three octavas like A3, C4, E4, F4, A4, C5, E5, F5, A5, C6, E6, F6, A6. It becomes a "piece of music" by the function clock division that determines for each of the 12 notes how many clock ticks happen until the note is played the next time. Think it a A3 on every step, C4 every second step, E4 every third step and so on. I unmute one track after the other, beginning with C4 (A4 is left out).
Additionally there is a simple bass figure played by an acoustic upright bass.
A random function sets for each note a different velocity value.
Finally I transposed all tracks sometimes.
Astonishing enough this does not sound like invented from a machine.
The sounds for the piano and the upright bass come from a Roland SC-33 soundmodule.
SQ-4M - Users Manual
Firmware Version 0.29
VMC-1 Hardware Version 1.5.4
"SQ-4M" is a programm for an Arduino Nano mounted on a " fanwander VMC-1 ". The SQ-4M is a MIDI step sequencer which can be triggered by external positive voltage trigger signals, by an internal clock, by DIN-Sync or by MIDI-Clock. The SQ-4M provides 16 single event tracks with 32 steps per track, where each step can have a length of 8 bars (if you read the incoming trigger as 16th notes).
The event can be either
- a MIDI note,
- a MIDI ControlChange command
- a velocity value for another note-track
- a transpose value for another note-track.
Each track can have
- a different step length,
- a different clock-tick-per-step ratio.
This is valid for the transpose or velocit tracks too. So you can have a 12 note sequence with a velocity pattern that repeats after 5 steps, but each step takes 3 steps of the note sequence and a transposition sequence which has a steplength of four bars, and ... and ... and. The posssible combinations are endless.
Usually you will buy a fanwander VMC-1 with the software installed already. If your VMC-1 runs a different software at the moment, then please consult the programming instructions for the VMC-1 on how to install software.
Quickstart...
...for those, who think they don't need manuals:
- The function of the five buttons
*)On the first run of modules this button is labled "PLAY", in the later runs the button will be labled "START".
START *) STOP WRITE F1 F2 Stop Mode Play
Write Enter SETUP Delete Sequence <--Hold Hold--> MIDI-Reset -- track ++
<--TRACK SELECT unmute all mute all <--ALL TRACKS (transpose) Play Mode Pause Stop Write Enter Setup -- Track ++
<-- TRACK Select unmute all mute all
<-- ALL TRACKS (Transpose) Write Mode End & Play End & Stop Back Tie for note tracks
Enter for cc tracks of velocity tracksRest Setup Mode Select Param Exit Setup Edit < Parameter > TRACK Select -->
-- Track ++ Set Param
HOLD and select with CV2 Set -- Value ++
- Good Luck :-)
Now more details for the patient ones...
Connect and Configure the Hardware
This is described in the users manual of the VMC-1.
MIDI connections
Basically you need a device which sends MIDI-notes (I will call this "the keyboard") and a device which can respond to incoming MIDI-notes or MIDI-CCs (I will call this "the synth"). I will not explain how to connect MIDI devices. So establish the following MIDI connections
Keyboard-MIDI-Out <-> SQ-4M-MIDI-In,
and
SQ-4M-MIDI-Out <-> Synth-MIDI-In.
Usually you will get a VMC-1 with the SQ-4M software loaded, and set to factory settings. To test with the factory settings of the SQ-4M, set keyboard and synth to MIDI channel "1".
For other settings please consult the description of the "setup menu".
Press PLAY. The sequencer should play on the synth a repeating F-major-7 chord of 14 notes and you should be able to play the synth on the keyboard along with the sequence (at least as long as your synth is polyphonic).
If the sequencer plays other notes than the repeating F-major-7 chord then please do a "Factory Reset" as described in the section "setup menu", and follow the instructions for "Adjust Poti-CVs" in the section "setup menu" after the factory reset.
Selecting Tracks
The SQ-4M provides in the default configuration 16 distinct tracks. Many functions are available for each track separately, and some functions are valid for all tracks.
- To select a track in play mode or stop mode, press and hold the F2 button and flip through the tracks using the START and STOP buttons.
- To select a track in the setup mode, this works the other way around: press and hold the START button and flip through the tracks using the F1 and F2 buttons. (this opposite handling may feel confusing, but it is quite logical from the use of these buttons in the setup mode).
- It is not possible to select a track in write mode. You have to select the track in stop mode or play mode and enter the write mode then.
Write Mode
We assume you can play the default sequence successfully and your keyboard plays notes on the synth.
Writing a Sequence in the SQ-4M - Basics (Write a Note Track)
- If the sequencer is running hit the STOP button. (you may change to WRITE mode also, while the sequence is running, but for now it is easier to do this in STOP mode.)
- Press and Hold F1 and press STOP to mute all tracks
- The Display should look like this:
STOP Tr1
all tracks muted - The display tells us, that we are in stop mode and track 1 is selected.
- Hit the WRITE button.
=> the display says "WRITE" (who would guess...) - Play a few single notes on your keyboard. Be sure not to overlap notes.
=> you should see on the display the counter in the upper line count up with each note. Also you should see the recorded MIDI note number and in the lower line a "+"-character for each step.WRITE #49 4
++++ - Hit PLAY.
=> the SQ-4M will play the notes that you've entered before.
The WRITE-mode ends either if you hit STOP or PLAY or it ends automatically if you reach the track length limit.
* If you write a track while the sequence is running and you end the WRITE-mode with STOP, then the sequence will continue running, but the current track will be in pause mode. If you end the pause mode by pressing PLAY the current track will start playing on the next bar
* If you write a track while the sequence is running and you end the WRITE-mode with PLAY, then the current track will start with the next bar
The sequencer can store up to 32 steps. A step is written, as soon as you press the key down on your keyboard. Even if you play more than one keys without releasing the first one always a new step is written with any new keypress
Writing will keep a sequence only in the runtime memory. Unless you save the pattern the entered sequences will be lost after a powering off or reset as it happens after uploading a new firmware.
To store the sequence permanently on the EEPROM, you have to use the functions SAVE and LOAD in the setup menu. If you want to use this Arduino board for other applications please obey the remarks in the chapter about -> setup -> save/store.
Write Mode extended - tied notes and rests
Lets write now a four note phrase.
Select an organ like sound at your synth. Take care, that there is no long "Release" on the sound.
- Press WRITE
- Play Key C
- Press F2 (=REST)
- Play Key C
- Press F1 (=TIE)
- Press STOP
- Press PLAY
The sequence will play something like "Dap, Daaaah, Dap, Daaah,...."
Do the same with A.A-C.C-A.A-E-G- and sing "Fly, Robin, Fly".
Write Mode extended - Correcting Steps
There is no real editing of a sequence for now (it may be possible in a later firmware version), but while writing you can step back by hitting the WRITE button for each step back. Example:
We want to enter a Cmaj scale, but hit G# instead of G:
- WRITE
- C
- D
- E
- F
- G#
- A ... Aaargh, Hold it! The G# was wrong...
- WRITE (will step back and clear the A)
- WRITE (will step back and clear the G#)
- G
- A
- B
- C
- STOP
- PLAY
Check the step counter and the "+++..."-step-display-line while stepping back.
I think you 've got it.
Write Mode extended - Cancel Write!
Sometimes it happens (at least to me), that you press WRITE, though you did not want to write a new sequence. In this moment you have the chance to cancel the write-mode (and keep the existing sequence), by pressing STOP. But it is important, that no MIDI-NoteOn came in meanwhile and that you did not hit TIE, REST, or PLAY. As soon as one event happens, that the write-mode would record, the former sequence of this track is gone.
Write Mode - Write Values for CC-Tracks or Velocity Velocity Track
You can write a sequence of CC values or velocity values in multiple ways:
- be sure to have no cable plugged into the input CV2; use the knob CV2 to dial in the value and confirm with F1 Button
- (coming with Version 0.40:) hold the PLAY button and play notes on the keyboard within a range of one octave below and above the transposition center note. This will be more coarse than the method with the CV1 knob, but it is much quicker
Erase All Tracks - (Version 0.17 and higher)
Sometimes you may want to start a pattern from the scratch. That for use the following order of button presses:
- press and hold F1,
- press and release WRITE,
- release F1.
This will write pauses on all steps of all sequences. The track length of all tracks will be set to 1. The track parameters like track type or out channels are kept.
Play Mode
Playing a written sequence is simple: hit PLAY. The sequence will play in the tempo of the tempo potentiometer (or external clock - if selected) and with the blinking LED. (The LED blinks always - even when the sequence is stopped). Hit STOP to end the play mode.
Play Mode - set Tempo
The SQ-4M provides an internal clock generator. The tempo-knob controls the speed of the clock.
Play Mode extended - Thru
While the sequence is playing, MIDI information from the keyboard may be forwarded to the output (so called Soft-Thru); this forwarded note will be sent on the MIDI channel of the selected track. The SQ-4M provides various thru-settings. For details see the setup section.
Play Mode extended - Transpose
The SQ-4M also provides the possibility to transpose the played sequence according to the incoming keyboard notes. There are four different types of TRANSPOSE: continous, momentary, button-enabled, and track. In the "track" transpose mode any other track can be used for transposition. Since the SQ-4M does not distinguish between values for notes, CC-values or velocity, any track may be used. A track can be configured as dedicated transpose track. The difference is, that transpose-tracks are not affected by the mute function, and they do not send MIDI note events. They are used only internally
The center note for the transposition (where no transposition happens) can be choosen in the setup. For details see the setup section.
Play Mode extended - external Trigger-In
This is the topic, where the SQ-4M is different to all other MIDI step sequencers, we know.
Please read now first at the chapter "Setup Mode" about the two different NoteOff modes
You may replace the internal tempo clock or MIDI-clock, by an external trigger signal fed to the CLOCK-IN socket. To speak more exact: this is handled as a GATE signal. The input expects a voltage of +5 Volt (=gate on) or 0 Volt (=gate off).
If the input rises from 0V to +5V the MIDI noteOn messages for the notes in the actual step are sent.
If the input falls down from +5V to 0V and the noteOff mode is set to "clocked", then the MIDI noteOff messages for the notes in the actual step are sent.
This means the length of the incoming "clock gate" determines the length of the played note.
(The gate signal may be higher than 5V, but gate off has to be 0 Volts)
What is that good for?
Example 1:
Have a drum machine like Roland TR-808 that sends continuous 5V-clocks.
- Connect the clock out of the drum machine with the CLOCK-IN of the SQ-4M.
- Press PLAY on the SQ-4M (the sequence will not play yet!)
- Start the drum machine
=> The SQ-4M will play in the tempo of the drum machine.
Example 2:
- Have a drum machine with progammable trigger out, like the Roland TR-606 or Roland TR-08 or many others.
- In the Setup reassure, that the "Note Off Mode" is set to "Held Note" (this is the default value from the factory - if you didn't change it until now, then go on)
- Write a sequence of four notes:
G A C D - In the drum machine set a trigger at the first step of a bar, but none on the other steps in the bar
- Hit PLAY at the SQ-4M and start the drum machine
=> The SQ-4M will play a four bar sequence, with changing notes at every bar and each notelength is the full bar.
If you would try this with a regular internal 16th clock, you would need 64 steps using the TIE function. Having the externally programmed trigger on step one, you have to enter only four steps.
Example 3:
- Have a drum machine with programmable trigger out, like the Roland TR-606 or Roland TR-08 or many others.
- Write a sequence of four single notes:
D E G A - In the drum machine set triggers at the following positions of a 4/4 pattern
x.x.xx.x.xx.x.x. (x means a trigger, dot means no trigger) - Hit PLAY at the SQ-4M and start the drum machine
=> The SQ-4M will play a sequence which will repeat not before 9 bars.
Now change the sequence to "D" "E" "REST" "G" "A" "REST" => I think you will get it.
Clock Division per Track
The three previous examples assume that each incoming clock tick triggers one step of the sequence. Each track has a parameter "CLOCKDIVIDER TR" (don't mismatch this with the global parameter "Clock Ratio"). With this parameter you determine how many clock ticks must come in to make this track advance to the next step. If you set the clockdivider to a different value for each track, you can get very complex sequences from very simple base tracks. Just one example: enter for each track two notes like this:
Track 1: C2 G2
Track 2: C3 G3
Track 3: H3 C4
Track 4: E5 D5
As long as the clockdivider has the same value on all tracks, this will be very boring. Now set the clockdivider like this:
Track 1: 2
Track 2: 1
Track 3: 3
Track 4: 5
The sequence will look like this:
Track 1: C2 G2 C2 G2 C2 G2 C2 G2 C2 G2 C2 G2 C2 G2 C2 G2 C2...
Track 2: C3 G3 C3 G3 C3 G3 C3 G3 C3 G3 C3 G3 C3 G3 C3 G3 C3 G3 C3 G3 C3 G3 C3 G3 C3 G3 C3 G3 C3 G3 C3 G3 C3...
Track 3: H3 C4 H3 C4 H3 C4 H3 C4 H3 C4 H3 ...
Track 4: E5 D5 E5 D5 E5 D5 E5 ...
Now it takes 60 steps until this simple two step sequence repeates.
Mute the sequenced MIDI while playing
If the sequencer is playing and you press START again, then the MIDI-Out of the currently selected track will be muted. No NoteOn messages will be sent from the sequence. MIDI NoteThru will still work. The "PLAY" in the top line of the display will change to "play", but you will see in the second display line, that the sequence continues running.
As soon as you press START again, the display will change to "plAY" and beginning with the next step #1 of the sequence the NoteOn messages will be sent again (and the display will change back to "PLAY"). If you press START again while the display shows "plAY" then the sequence will be unmuted immediately.
If you want to mute all tracks at the same moment, press and hold F1 and press STOP (the sequence won't stop! Only all tracks will be muted). If you want to unmute all tracks at the same moment, press and hold F1 and press START.
If the sequence is stopped, then it depends on the setting of the track parameter "PLAY-ON-START" whether the initial Start command will unmute all tracks (setting "Play always"), or whether the muting status that was given when you stopped the sequence, will be kept (setting "Obey mute mode").
The muting will not affect the MIDI events provided by the MIDI-Thru functions!
A MIDI start command will not act as mute function, but if PLAY-ON-START is set to "Play always"
Velocity Control and Random Velocity
The velocity of the notes sent by the sequencer is basically fix, because the sequencer does not record the velocity value of the incoming notes. Depending on the global settings and the individual tracksettings the velocity comes
- either directly from the CV1-knob,
- or from the CV1-knob as basic value with random variations, where amount of this randomization is controlled by the CV2 knob,
- or from a dedicated velocity track
Shut up and reboot
Though software should be perfect, software never is perfect. So if this software hangs there exists a full system-reset:
pressing all five buttons at the same time will restart the program. Unfortunately the Arduino itself may hang. In this case you have either to power cycle your system, or press the reset button on the Arduino pcb.
Setup Mode
In the setup mode you configure the general behaviour of the SQ-4M and the individual tracks. You can enter the setup mode in play mode or in stop mode. In write mode the setup is not available.
- To enter the setup menu press both F1 and F2.
- The display will change and list the current parameter in the upper line. The lower line will display the current value of the parameter.
- To page through the parameters use F2 for "next" and F1 for "previous".
- To change the value of a parameter press WRITE.
=> An exclamation mark ("!") will appear at the begin of the lower line to mark the EDIT mode. - Change the value with F1 (=decrease by one) and F2 (=increase by one), or hold the STOP button and dial the value with the CV2 knob (remove cables from the CV2 input before!).
- Press WRITE again to leave the EDIT mode.
=> the value will be stored in the non volatile memory and the "!" disappears. - To leave the setup menu press PLAY and STOP together.
After a system reset or startup the setup starts always with "transpose mode". You may step through all parameters in a circle in the both directions.
On each following lookup of the setup menu, you will be placed in the menu, where you left the setup before.
If you are at editing the parameter of a track (step 5 in the list above), then you may page through the tracks and change the currently selected parameter there too.
If you have entered the setup mode while the sequence was playing, the sequence will continue playing, but you cannot stop it in setup mode. You have to leave the setup mode to stop a playing sequence.
Since the internal clock is software created and the setup mode eats up a lot of processing, the internal clock will assumingly become a little slower.
List of the available Parameters:
- "Transpose": switches between various transpose modes and off.
- "Noteoff Mode": switches between a gated note length and notelength until the next step.
- "Note Length": sets a minimum note length for the gated NoteOff mode.
- "In-Channel": sets the MIDI channel on which the SQ-4M expects incoming note data.
- "Out-Channel TR": sets the MIDI channel per track on which the SQ-4M sends its sequence.
- "Tracktype TR": sets the type of MIDI message which is sent by this track
- "CC-Number TR": sets the CC-Number which is sent, if the track type is CC.
- "Vel.Source TR": sets the source for the velocity values sent by this track.
- "Trans.Src TR": enables/disables transposition for this track and sets the source of the transposition
- "Clockdivider TR": sets the clockdivider per track.
- "PlayOnStart TR": sets the mute behaviour of each track, when the sequence is started.
- "Note-Thru": determines under which conditions incoming notes from the keyboard are forwarded to the synth.
- "Control-Thru": sets whether incoming MIDI-ControlChange data are forwarded to the synth.
- "Program-Thru": sets whether incoming MIDI-ProgramChange data are forwarded to the synth.
- "Bend-Thru": sets whether incoming MIDI-Pitchbend data are forwarded to the synth.
- "OtherCh-Thru": sets whether MIDI-data on other channels than the out channel are forwarded to the MIDI out.
- "Copy Paste": allows copy and paste between tracks (still buggy in V 0.29 - sorry)
- "Adjust Poti-CVs": adopts the software for the real potentiometer values
- "Factory Reset": restores to the default parameter values and loads the test sequence
- "SaveSequence": saves the actual sequence in the EEPROM
- "LoadSequence": loads the sequence from the EEPROM
- "Clock Source": selects the clock source
- "Start/Stop Source": determines which source starts and stops the sequencer
- "Send Clock to...": determines whether the SQ-4m sends clock to MIDI and/or the VMC bus (Din-Sync)
- "Clock Ratio": determines the step ratio of the incoming/sent MIDI-clock or DIN-Sync-clock and the internal steps
- "Transp.Center": sets the note value, that corresponds to 'no transposing'
Now the detailled desciption of the parameters
Transpose (global)
Transpose shifts the pitch of the sequences played.
This parameter applies to all tracks that use "Global Transpose" as the transposition source.
The transposition refers to the "center note", which corresponds to "no transposition" and is set with a separate parameter. The default setting is MIDI NoteNumber 60 (C5). MIDI NoteNumber 62 = D5 therefor shifts the sequence up by a whole note, MIDI NoteNumber 53 = F4 down by a fifth.
If a transposition shift is effective, its amount is displayed in Play and Stop mode.
Transposition does NOT affect the notes played manually via MIDI Thru and has no effect on the notes stored in memory - it is only a playback function. Transposition is not active for the Thru notes in write mode.
| Value | Comment |
|---|---|
| off | No transpose. This is NOT a global disableing. If an individual track does not use "Global Transpose" it still will transpose! |
| Continous | All incoming MIDI NoteOn events are used for the transposition. MIDI Thru is deactivated in this transpose mode. |
| Momentary | The sequence is transposed only as long as the transposing key on the keyboard is pressed. MIDI Thru is deactivated in this transpose mode. |
| ButtonEnabled (Factory Default) | While play mode press the F2 button and play a key on your keyboard to set the transposition. As soon as you release the F2 button this transpose value is kept and incoming MIDI Note events are used for MIDI Thru. Only the sequence will be transposed. The MIDI Thru events will not be changed. This mode corresponds to the transpose mode of the Roland JX-3P or Juno-Series - with exception of the MIDI-Thru behaviour. |
| Track 1-16 | The values of the selected track are used for transposition; also these values take the center note into account. |
Velocity (global)
This determines the velocity values or played sequences. This parameter is valid for all tracks which use the "global velocity" as velocity source.
| Value | Comment |
|---|---|
| Constant (CV1)(Factory Default) | Potentiometer CV1 sets the velocity. If an external voltage is fed into the CV1 socket, then the potentiometer CV1 determines the amount of this voltage control. |
| Random (CV2) | Potentiometer CV2 sets the amount of a random value. The constant CV1-value still can be added. If an external voltage is fed into the CV2 socket this voltage controls the amount of this random value and the potentiometer CV2 determines the amount of this voltage control. |
| Track 1-16 | The values of the selected track are used for the velocity |
Noteoff Mode (global)
The noteOff mode selects, what determines the outgoing noteOff. In play-mode this setup page can be reached directly by pressing the WRITE button.
| Value | Comment |
|---|---|
| Legato (Factory Default) | The noteOff is sent immediately before the next step. This mode is the same as in the Roland JX-3P or SH-101. Please keep in mind that stopping an external clock source in this mode without stopping the SQ-4M sequence will cause the last note to "hang". Press STOP on the SQ-4M then. |
| Gated | The noteOff is sent when the incoming clock signal goes from +5V to 0V. With the internal clock this is at 50% off the step time. |
In Channel
The MIDI-channel on which the SQ-4M expects the data, that shall be written into the sequence or shall be used for transposing and MIDI-Thru
| Value | Comment |
|---|---|
|
1 - 16 (Factory Default = 1) |
Incoming MIDI data on the in-channel will be sent out on the out-channel. This is valid also for control, programchange, and pitchbend data! It is recommended to deactivate OtherChannelThru if in-channel and out-channel are different. The main intention for this feature is that you may have a single keyboard, but several SQ-4Ms (or similar devices) in the thru chain. In that case you don't have to change the send channel on your keyboard, but simply use the out-channel on the SQ-4M. |
Out Channel (per Track)
The MIDI-channel on which the sequence of the corresponding track and thru'ed Program/Control/Bend-data are sent out.
| Value | Comment |
|---|---|
|
1 - 16 (Factory Default = 1) |
This parameter can be set per track. Pay attention if you are in playmode: Changing the Channel while the sequence is playing or thru'ed notes are active will cause note hangs. In some special cases this may be wanted behaviour, so we did not prevent this. To end these hangs while play mode switch back to the former channel, leave the setup mode and press TIE (the sequence will play on) or STOP (the sequence will stop). |
Tracktype (per Track)
Sets the type of MIDI message, which is sent by the corresponding track
| Value |
Comment |
|
|---|---|---|
| Note (Factory Default) | This Tracks sends MIDI Note messages. | |
|
CC |
This track sends MIDI ControlChange messages. | |
| Velocity | This track can be used as velocity source for other note-tracks. | Transpose and velocity tracks are not affected by the pause mode |
|
Transpose |
This track can be used to transpose other note-tracks | |
CC-Number (per Track)
If the track is a CC-track, then this value determines which ControlChange message is sent.
| Value | Comment |
|---|---|
|
0 - 127 (Factory Default = 1) |
Determines the MIDI control change number which is used to send the values of this track, if its track type is "CC". |
Velocity Source (per Track)
If the track is a Note-track, then this value determines which source controls the velocity value of the notes sent.
| Value | Comment |
|---|---|
| Constant (CV1) | Potentiometer CV1 sets the velocity. If an external voltage is fed into the CV1 socket, then the potentiometer CV1 determines the amount of this voltage control. |
| Random (CV2) | Potentiometer CV2 sets the amount of a random value. The constant CV1-value still can be added. If an external voltage is fed into the CV2 socket this voltage controls the amount of this random value and the potentiometer CV2 determines the amount of this voltage control. |
| Global Velocity (factory default) | The source set in the paramter "Velocity All" provides the velocity value. |
| Track 1-16 | The values of the selected track are used for the velocity. If the selected track is not defined of type "velocity track" then a question mark will be shown after the tracknumber. The setting works nevertheless. |
Transpose Source (per Track)
If the track is a Note-track, then this value determines which source controls the transposition of the notes sent.
| Value | Comment |
|---|---|
| No Transpose | No transposition will happen. This setting is usually used for drum instruments. |
| Global Transpose (factory default) | The source and behaviour, which has been set in the paramter "Transpose All" provides the transposition setting of this track. |
| Track 1-16 | The values of the selected track are used for the velocity. If the selected track is not defined of type "transpose track" then a question mark will be shown after the tracknumber. The setting works nevertheless. It is not possible to choose the current track itself for transposition - the display will show "Invalid". |
Clockdivider (per Track)
This parameter sets how many clock ticks have to happen until the selected track advances to the next step.
| Value | Comment |
|---|---|
|
1 - 128 (Factory Default = 1) |
This parameter determines how many clock ticks of the clock input have to happen to switch the sequence of this track to the next step. Keep in mind: This is NOT the division related to the incoming MIDI-Clock. It adds up to the global divider. Examples: You want to have 1/8th note steps. If the global divider is set to 1/16th, then you have to set the clockdivision per track to "2". You want to have a transpose sequence advance for one step every second bar. If the global divider is set to 1/16th, then you have to set the clockdivision per track to "32" (= 2 bars with 16 clock ticks each bar). |
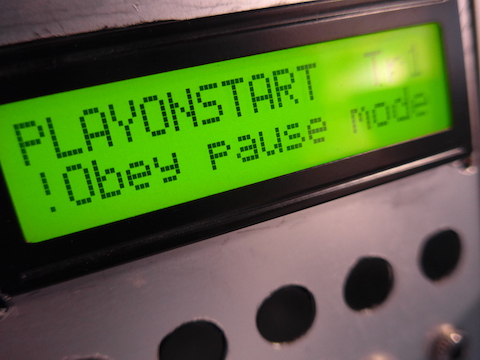
PlayOnStart (per Track)
This parameter determines whether the corrsponding track begins to play always on a start command, or whether the current mute state is obeyed
| Value | Comment |
|---|---|
| Play always (Factory Default) | The corrsponding track begins to play always on a start command. If the track was muted before it will become unmuted. |
| Obey pause mode | On a Start command the current mute state is obeyed. If the track was muted before, it still will be muted when the sequencer begins running |
Note Thru
This parameter determines under which condition note messages from the keyboard (= on the in-channel) are forwarded to the synth (= on the out-channel).
| Value | Comment |
|---|---|
| Off | Incoming note data are not forwarded. |
| Rec | Incoming data will be forwarded while writing the sequence, but not while play or stop. |
| Play | Incoming data will be forwarded while the sequence is playing or stopped, but not while writing the sequence. This mode may be useful for using the SQ-4M live on stage. You may enter the sequence unheard, without the need to mute the synth. |
| Rec+Play (Factory Default) | Incoming data will be forwarded all the time. |
Control-Thru
Determines whether MIDI controlchange data from the keyboard (= in-channel) are forwarded to the synth (=out-channel)
| Value | Comment |
|---|---|
| On (Factory Default) | see general comment regarding the thru modes below |
| Off |
|
Program-Thru
Determines whether MIDI Programchange data from the keyboard (= in-channel) are forwarded to the synth (=out-channel)
| Value | Comment |
|---|---|
| On | see general comment regarding the thru modes below |
| Off (Factory Default) |
|
Bend-Thru
Determines whether MIDI controlchange data from the keyboard (= in-channel) are forwarded to the synth (=out-channel)
| Value | Comment |
|---|---|
| On (Factory Default) | see general comment regarding the thru modes below |
| Off |
|
!!! Important Remark on Thru-Modes !!!
If you use the same device as keyboard and as synth then all those Thru-settings depend on your instrument.
If the instrument has a local-off mode, then you should activate this local-off mode and you should set all Thru-settings to "On" and the NoteThru not to "On". For example my Rhodes Chroma Polaris in local off mode needs ControlThru and BendThru set to "On". Otherwise the Chroma Polaris could not be edited. But ProgramThru has to be set to "Off". Otherwise a MIDI-Loop on program change commands would happen and bring the whole MIDI-system to hang.
If the instrument has not(!) a local-off mode then you MUST set all Thru-settings to "Off". Otherwise you would create an endless MIDI-loop which typically makes all processors overload and leave the system in unusable state, which typically can be solved only by switching off both the synth and the SQ-4M. The same is valid if you use the SQ-4M at the input and output of a MIDI-sequencer like Logic, Cubase, Ableton, Reaper, what ever...
OtherCh-Thru
Determines whether incoming MIDI data (no matter which type) in channels other than the out-channel are forwarded to the output.
| Value | Comment |
|---|---|
| On | A high MIDI traffic on other channels will affect the performance of the SQ-4M since every data byte has to be handled by the processor. It even may cause the sequence to stutter or to stop. (Imagine an orchestras conductor who also has to hand out dishes from the kitchen while the concert all the time...) If OtherCh-Thru is activated, then MIDI-Clock and MIDI-Start/Stop will be forwarded always! The MIDI library used by SQ-4m doesn't allow to suppress clock in its Thru Modes. |
| Off (Factory Default) |
|
Copy Track
This features copies the track-individual settings from one source track to a clip board and allows to paste those data into other track settings. A similar function is planned for the sequence values of the tracks.
| Value | Comment | ||
|---|---|---|---|
| See comment |
The display reads:
The display switches to:
|
Adjust Poti-CVs
Potentiometers are produced with a tolerance of 10% or even 20%. This function adopts the software to the individual potentiometers in this circuitry. This procedure has to be done after a factory reset.
| Value | Comment | |
|---|---|---|
| See comment | After pressing WRITE a screen will be displayed like
If you did not set the potentiometers to the maximum before pressing WRITE the second time, then wrong offsetvalues will be stored. This won't harm the module electrically, but unwanted effects might happen on the MIDI-out. If this happens, simply repeat the procedure with the potentiometers set to maximum really. The offset-values will be stored in the non-volatile EEPROM. So usually this procedure has to be called only once. |
Factory Reset
Writes the factory default settings in the non-volatile EEPROM and loads them then into the runtime memory.
| Value | Comment |
|---|---|
| no value - display reads: Press Write twice |
Press the WRITE button twice. The display will change to "Reset EEProm", and then you will see the "Load Sequence" display (see below). After the first WRITE you can cancel the Reset by pressing STOP. This should not be done in PLAY mode. Hanging notes and other unwanted issues might occur. REMARK FOR VERSIONS BELOW 0.19: the factory reset overwrites the settings of the potentiometer adjustment you have to redo the potentiometer adjustment. |
Load Sequence
Loads the sequence stored in the non-volatile EEPROM into the runtime memory.
| Value | Comment |
|---|---|
| no value - display reads: Press Write twice |
Press the WRITE button twice. A dotted line will run from right to left symbolizing the loading. Then the lower line reads "Load Done". After the first press on WRITE you can cancel the Load-action by pressing STOP. Load should not be done in PLAY mode. Hanging notes and other unwanted issues might occur. |
Save Sequence
Saves the sequence from the runtime memory in non-volatile EEPROM.
| Value | Comment |
|---|---|
| no value - display reads: Press Write twice |
Press the WRITE button twice. A dotted line will run from left to right symbolizing the saving. Then the lower line reads "Save Done". After the first press on WRITE you can cancel the Save-action by pressing STOP. Save may be done in PLAY mode, but the sequence may stumble if the save action takes longer than one step of the sequencer |
Clock Source
Selects the clock source if no trigger signal is supplied to the Clock-In socket. The setting does NOT affect the Start/Stop control.
| Value | Comment | ||
|---|---|---|---|
| Internal (Factory default) | The internal clock generator is used. | ||
|
MIDI Clock |
Incoming MIDI clock is used |
These settings are NOT stored in the non-volatile memory. If the module is resetted or powered down the sequencer will always run on the internal clock generator! (you may change this in the code easily) |
|
|
VMC Clock |
Incoming clock from the internal VMC-bus is used. This can be either a DIN-Sync from an IO-Module or the VMC clock from a ClockMan or ClockBoy | ||
Attention! Do not change these settings while the sequencer is running!
Start/Stop Source
Selects which source for start and stop commands is used.
| Value | Comment | |
|---|---|---|
| Internal only (Factory default) | Only the Start and Stop buttons and triggers from the corresponding inputs are used. | |
|
MIDI Start/Stop |
Incoming MIDI Start and Stop commands are used too. The local START and STOP buttons still will work. The pause/continue function is not affected by a MIDI Start command. | |
|
VMC Start/Stop |
The Start/Stop status from the internal VMC-bus is used too. This can be either a DIN-Sync from an IO-Module or the VMC clock from a ClockMan or ClockBoy. The local START and STOP buttons still will work. The Pause/Continue function is not affected by the VMC running status. | |
Send Clock
Determines whether the SQ-4m sends clock signals when running with the internal clock.
| Value | Comment | ||
|---|---|---|---|
| none (Factory default) | the SQ-4m does not send MIDI clock or VMC clock from its internal clock. |
IMPORTANT NOTE: Incoming(!) MIDI-Clock and Start/Stop commands will be always forwarded to the MIDI-Out if "OtherCh Thru" is active. |
|
|
MIDI |
the SQ-4m sends MIDI clock MIDI Start/Stop commands from its internal clock. | ||
|
MIDI + VMC |
the SQ-4m sends MIDI clock MIDI Start/Stop commands and VMC-clock and VMC-run-status from its internal clock. | ||
|
VMC |
the SQ-4m sends VMC-clock and VMC-run-status from its internal clock. | ||
Global Clock Ratio
Sets the relation of the internal 24bpq clock or MIDI/VMC-clock to the clock signal, which is sent to sequencer tracks
| Value | Comment | ||
|---|---|---|---|
| 1/16 (Factory default) | 16 triggers per 4/4-bar. |
This setting adds to the track individual divider. The setting determines the fastest step rate of the sequences! Please see the comment at "Clock Division per Track". |
|
|
1/8 |
8 triggers per 4/4-bar. | ||
|
1/4 |
4 triggers per 4/4-bar. | ||
|
1/1 |
one trigger each 4/4-bar | ||
|
2/1 |
one trigger each two 4/4-bars | ||
|
1/12 |
12 triggers per 4/4-bar ("R&B-shuffle") | ||
|
1/24 |
24 triggers per 4/4-bar ("jack swing") | ||
Transp. Center
Sets the note value, that corresponds to 'no transposition'
| Value | Comment |
|---|---|
| 0-127 (Factory default 60) |
|
All product names and brand names beside "VMC-1", "SQ-4M" and "fanwander" belong to the corresponding owners. They are mentioned only for educational purposes.
©Florian Anwander, 2020-2025 [ imprint/impressum ] [ contact ]